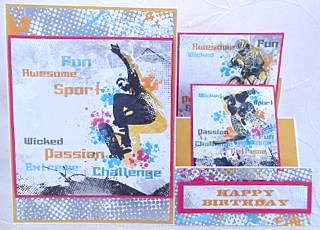
Side Step Card
Create a side step card using these instructions and measurements.
|
This card has one more step than the simple stepper card (click on the link for instructions for that card) and requires a few extra measurements and folds. |
 |
I have provided template pictures and measurements for two different sizes of card. The technique is the same for whichever size of card you make and you can also make the card with the steps on the left hand side.
Instructions
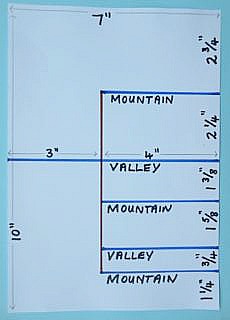
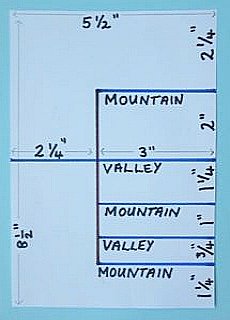
The templates below are for a 10 x 7" and a 8 1/2 x 5 1/2" size piece of card.
The line running vertically down the template is a cutting line and the blue lines are fold lines.
 |
 |
Take your card, and using the guide and measurements, mark a dot with a pencil the two ends of your cutting line. Use a craft knife to cut the line.
If you make your own card template with the measurements and marks on it, you can make a small hole at each end of the cutting line (with a thick needle or awl). Then when you use your template again you can mark through the holes with a sharp pencil and mark your cutting line quickly.
Score the lines marked in blue on the template at the measurements shown. Notice that on both templates the line at the halfway point on the card goes all the way across the card.
A scoring tool such as the scor-pal or Martha Stewart score board does make scoring the lines easier. You put the right hand side of the card (as it corresponds to the template picture) against the top of the score board and just score down from the measurements to the cut line - apart from the one score line that goes across the width of the card.
Fold along your score lines.
Fold the first score line at the bottom of your card to make a mountain fold - the next score line will be a valley fold - then a mountain fold - continue to fold the score lies in this way.
Use a bone folder to rub along the folds to reinforce your creases.
|
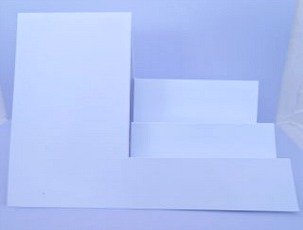
Your card should now look like this.
Your side step card is now ready to decorate. |
 |
Side Step Card > Card Making > The PaperCraft Room