Never Ending Card
|
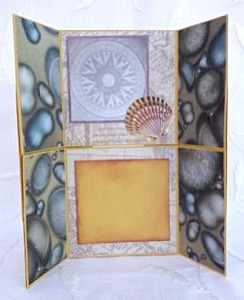
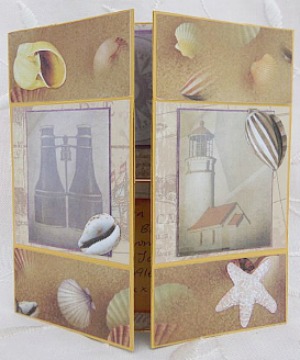
A never ending card is amazing. Each time you open it another layer is revealed and you can just keep turning. They are fun to make and fun to receive. It is an impressive card and looks complicated to make, but it isn't difficult. The only tricky bit to explain on this tutorial is the folding after sticking your card together. However when you make the card the folds at the end are quite intuitive to do. |
Instructions
For my Never Ending Card I cut 4 pieces of card each measuring 6" x 3" (look at the details below for other sizes). Use quite a thick card stock as your finished card will probably receive quite a bit of folding and handling.
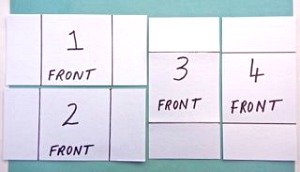 |
Score each of these pieces 1 1/2" in from each of the short edges. (I have marked the score lines in black). Fold on the scoreline each way and reinforce the crease with a bone folder. |
I have written on my card 'Front 1-4' and on the reverse side 'Back 1-4' so that it is easier for you to follow my instructions.
Lay your 4 pieces of card out as shown above.
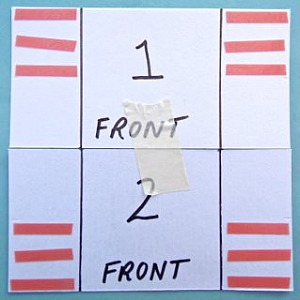 |
Apply double sided tape on the 4 corners of card as pictured here. The tape is applied within a 1 1/2" square - your fold line marks one edge of the square and it is a good idea to lightly mark the other. It is important that the tape does't go over the fold. You can see I have applied a piece of low tack tape across the center of the 2 pieces of card to stop them moving away from each other. |
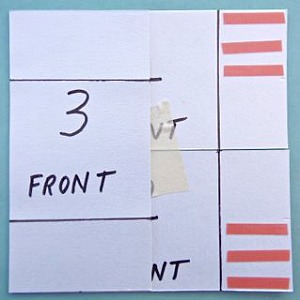 |
Take the piece of card (marked front 3) and stick it to the top left hand corner, matching corners carefully. Repeat with the bottom left hand corner. |
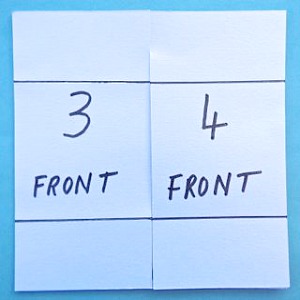 |
Repeat the process with the piece of card marked 'front 4' - sticking down the right hand corners. Your card now looks like this. |
Folding the Never Ending Card
Take hold of the edges of the card where they meet in the center and flip them backwards.
Rub along the new folds with your bone folder.
|
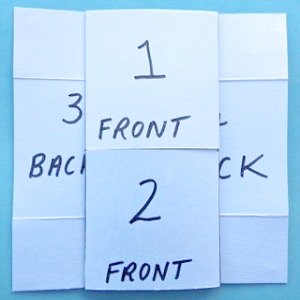
Take hold of the edges of the card at the center of the 2 squares ( labelled 'front 1' and 'front 2') and flip them back. Again reinforce the new folds with a bone folder. |
 |
|
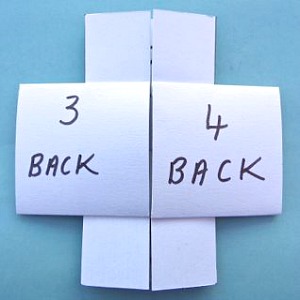
Take hold of the edges at the center of the 2 squares labelled 'back 3' and 'back 4' and again flip them back and reinforce the crease. |
 |
|
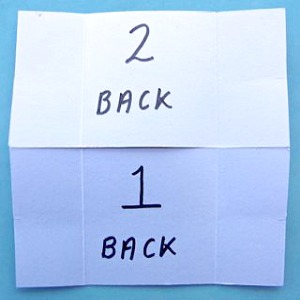
Your end result will be these 2 sides. Which you can just keep flipping. If as you flip and fold you find any of the panels are 'catching' you can just trim off a tiny bit if the edge. |
 |
Your Never Ending Card is now ready to decorate and you have lots of surfaces to decorate.
You can create panels to decorate your card and stick them on. Just make sure your panels are slightly smaller than the areas of card you are decorating, so the card can still flip.
Different Sizes of Card
I made the card with 4 panels each measuring 6" x 3" and scored them 1 1/2" from each end.
You could also try these sizes :
8" x 4" card and score 2'' from each edge (apply tape in a 2" square)
10" x 5" and score 2 1/2" from each edge (apply tape in a 2 1/2" square)
